
This post contains affiliate links.
If you are like me and have used a planner for years, it is probably something you can’t imagine your life without, I know I can’t. Every year around August, I would start browsing stores for the perfect planner for the following year. I would spend hours digging through the stationary section in stores like T.J. Maxx to find “the one.” Since I was buying bound book planners, it had to be just perfect. This process was always fun at first, but quickly became exhausting. I usually ended up settling for something that I wasn’t completely satisfied with.
This year (2021), now that I am out of college and am working full time, the realization hit me that it is ridiculous for me to keep settling for something that I use for an entire year. I do have a degree in graphic design, after all. I started by watching YouTube planner set up videos. I made lists and notes of things I liked and didn’t like. A few months later, I now have a custom planner for this year that I could not be more happy with. The best part is that I am using a ring system, so I can remove, add, or rearrange the information in whatever way that suits me for the moment. It is very versatile and I don’t feel stuck with a less-than-perfect planner. I put together some tips and information that may help you reach “planner peace” as well. Even if you don’t design your own inserts, there are tons of resources out there to make building your custom planner easy.
Figuring out what you want and need from your planner.
The first step is to figure out what kind of planner you need. There is an overwhelming amount of options out there. I started by watching YouTube videos of other planner set ups and made notes about what I liked. Using previous planners also gave me a better understanding of what I liked and disliked. Here are some things to consider:
The size of the planner. I use A5, which is comparable to half letter. The dimensions are slightly different, but it is close. There is also personal size, and pocket size, which are smaller. There are lots of other sizes, but those are the most common sizes I am aware of. I like having plenty of space in mine for lists, notes, and work information, so A5 suits me for now. You also need to consider where and when you will use the planner. If it is going to be used on the go, you may choose a smaller, more portable size.
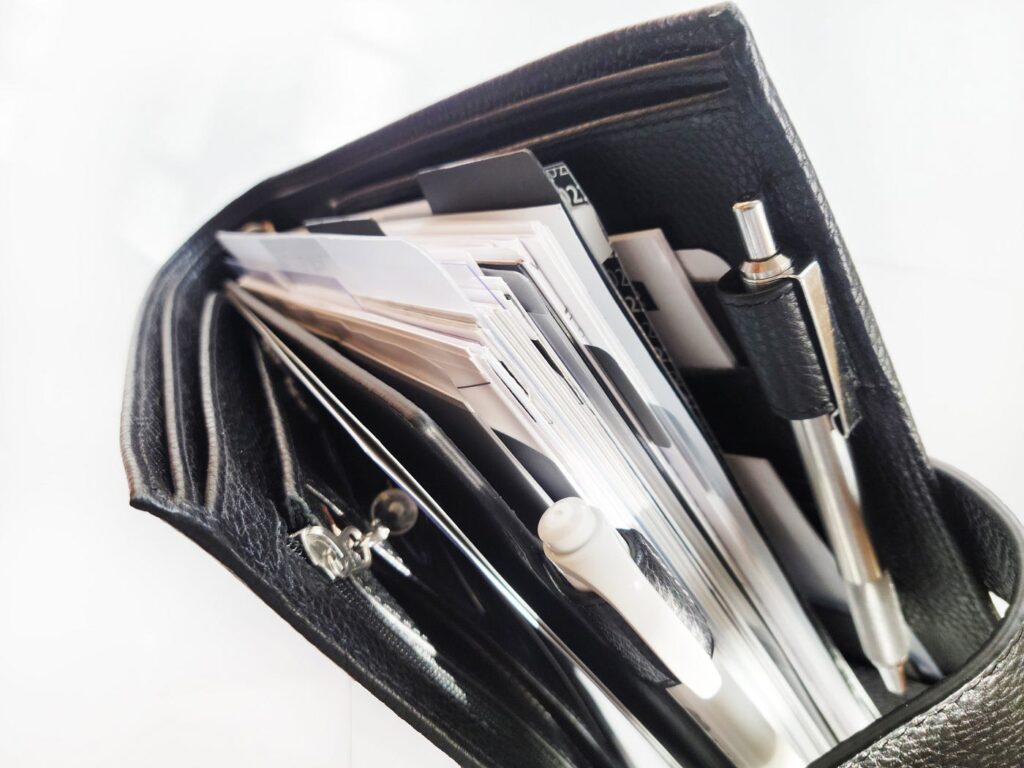
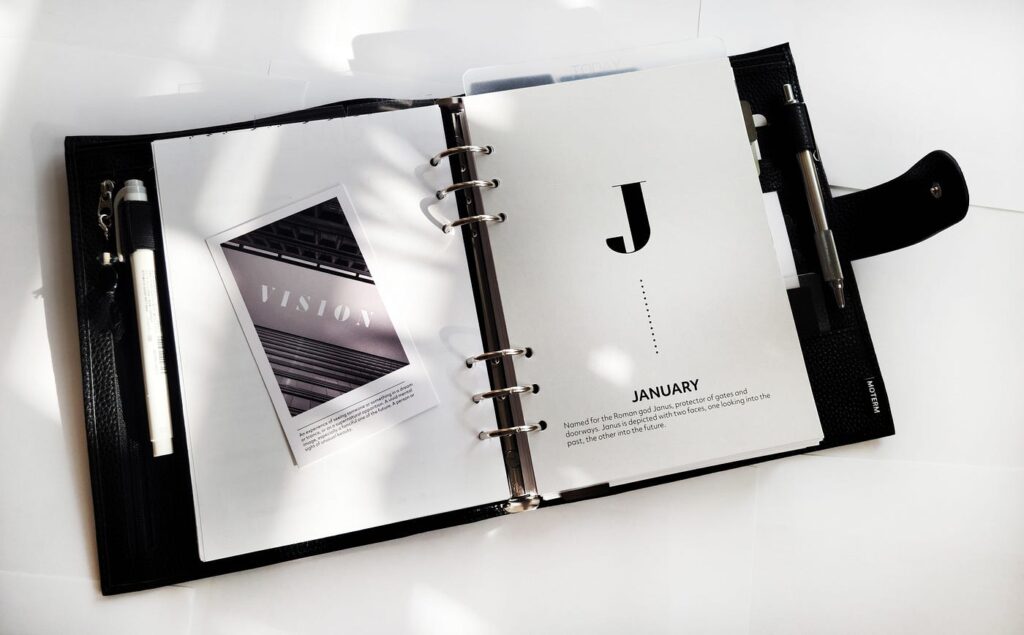
Ring bound or disc bound system. Of course there are other planning options out there, but these are the two that I have seen used most often for custom planner systems. I am currently using a Moterm brand, Luxe Black A5 Planner and LOVE it. It is very nice and luxurious but is still affordable. If you want to try a cheaper system first to make sure you like it, there are also options on Amazon. I have not used disc bound, but have heard of other having success with this system. You can also buy Agenda covers for the disc bound set ups.
Ring or Disc Size. Ring bound and disc bound systems come with different thicknesses. Obviously the larger the rings or discs, the more you can fit in your planner. I use 30mm rings, which is the larger size for ring planners. You may find smaller rings/discs work well for what you need.
Inserts
Once you have an idea of what size and style planner you need, start thinking about what inserts you will need. Again, there are so many options out there, but here are some ideas to get you started.
Types of Calendars. I like to use a dated monthly view, a dated weekly view, and an undated daily planner. I use my monthly calendar to first input any appointments or events. Then I transfer them to my weekly view at the start of each month. The weekly view is the root of my planning because I like to see my entire work week at a glance. It is the most used section of my planner. I keep some undated daily planning sheets because I use these if I have a very busy, task oriented day.
Other inserts you may want to include in your planner are blank notes, meeting notes, trackers for bills, health, etc., reference information like insurance or work related items, home inventory, cleaning schedule, the list goes on.
Printable Inserts
There is a surge of digital download products for planners right now, especially on Etsy. You can purchase a cheap, digital download and print your own inserts! This works great because you will have instant access to all of your inserts. You don’t have to purchase the printed versions from other sites and wait for them to be shipped to you. The files can also be resized to fit whatever planner you are using, offering even more versatility.
Since I designed and printed all of my own inserts for my planner, I opened an Etsy shop to share these. Check out PrintsbyKaitlyn on Etsy to see these inserts. I am adding new files on a weekly basis. If you have any ideas of things you would like to see in my shop, let me know!
Other Tools
There are some other tools you may need to create your custom planner.
Paper. You can order paper that is trimmed to the finished size of your planner, or in larger sheets and trim them down yourself. Since I am using A5 size, it easy easy to find this already trimmed down. Here is A5 paper from Amazon that is prepunched. You can easily run this through a desktop printer at home, then place them in your planner.
Hole Punch. If you aren’t buying prepunched paper, you may need a hole punch. These come in handy to have in case you need to include any other loose pieces of paper in your planner. Here is a 6-hole punch from Amazon that is adjustable. Here is also a disc punch from Amazon that comes with discs.
Paper Trimmer. You may need a paper trimmer if you plan to print your inserts on larger paper, or if you need to trim down any other items to fit in your planner. Here is a small, fairly compact and cheap option from Amazon.
Personalization
Personalizing my planner is the most satisfying part about using a custom system. You can use all kinds of decorative items like dashboards and journaling cards. You can use dividers and pockets, sticky notes and stickers, and don’t forget the pens and highlighters. For me, the deco is what makes it fun and what makes me want to keep using my planner. Check out my shop, PrintsbyKaitlyn on Etsy for some printable planner deco.
Make it FUN
Setting up your custom system may seem overwhelming. Start with the basics, like the planner system, the calendar and the outer cover, then you can add to it from there. I am still adjusting and adding to mine on a weekly basis. Planning for me is also turning into a fluid process. This is taking time for me to grasp, because I love creating systems that are fully functional and then sticking to them. But systems need to adapt and change, just as we adapt and change to the world around us. A custom system is great for adaptation. If you use a system for 6 months and decide that it’s not working for you anymore, you can completely change it up with a few different inserts.
It may also seem expensive to get started with a custom system, but using printable inserts and a cheap binding system to start is a great way to make sure it will work for you before you invest in all the deco and tools that go along with planning. Also, the items you invest in can be used for years to come, unlike buying a single bound planner that is only usable for a year.
After having my custom planner for just a couple of months, I never plan on going back to a traditional bound planner system.
STAY IN TOUCH!
Follow me on instagram for planning tips and inspiration. Be sure you are signed up for the newsletter to receive tips, inspiration, freebies, and more straight to your inbox!
Leave a Reply to admin Cancel reply